
What you’ll learn
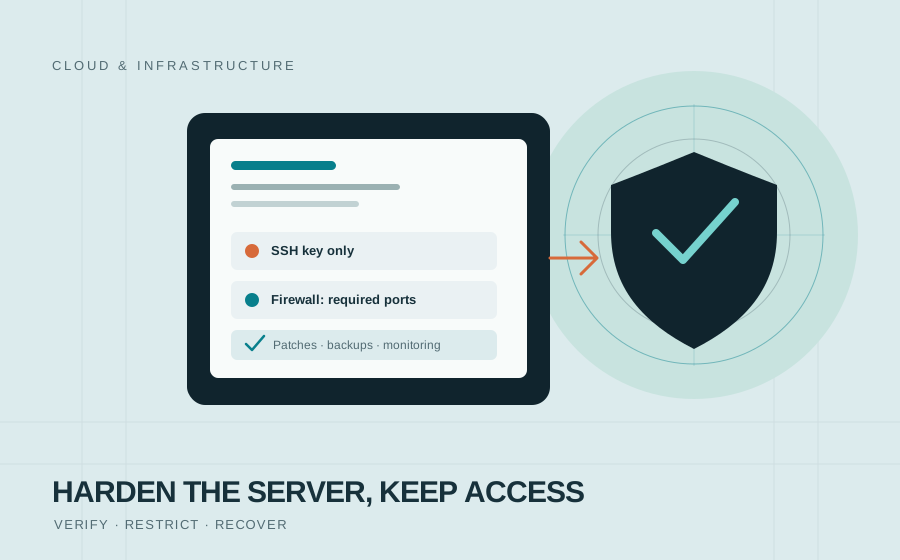
- Harden SSH access without losing your recovery route.
- Apply provider and host firewalls as separate security layers.
- Plan updates, monitoring, and backups for a Linux VM.
Before you start
Use a VM you administer, with provider-console recovery access and a current backup. Confirm the distribution and provider instructions; avoid applying firewall or SSH changes to a production system without an approved change plan.
Cloud virtual machines make it easy to run websites, business tools, and development environments, but a public IP address also makes a server discoverable to automated scanners. A newly created Linux VM may receive connection attempts quickly. That does not mean an attack will succeed, and no checklist can prevent every threat; it does mean the instance should be configured deliberately before it holds business data or serves production traffic.
This guide describes a baseline for a VM that you administer, using Ubuntu or Debian-style examples where noted. AWS, Azure, Hetzner, and other providers have different network-firewall interfaces and recovery options. Confirm commands and service names against your distribution, provider, and organization’s operating procedures. For a managed VM or cPanel server, coordinate with the hosting administrator before changing SSH or firewall settings.
1. Confirm scope and recovery before hardening
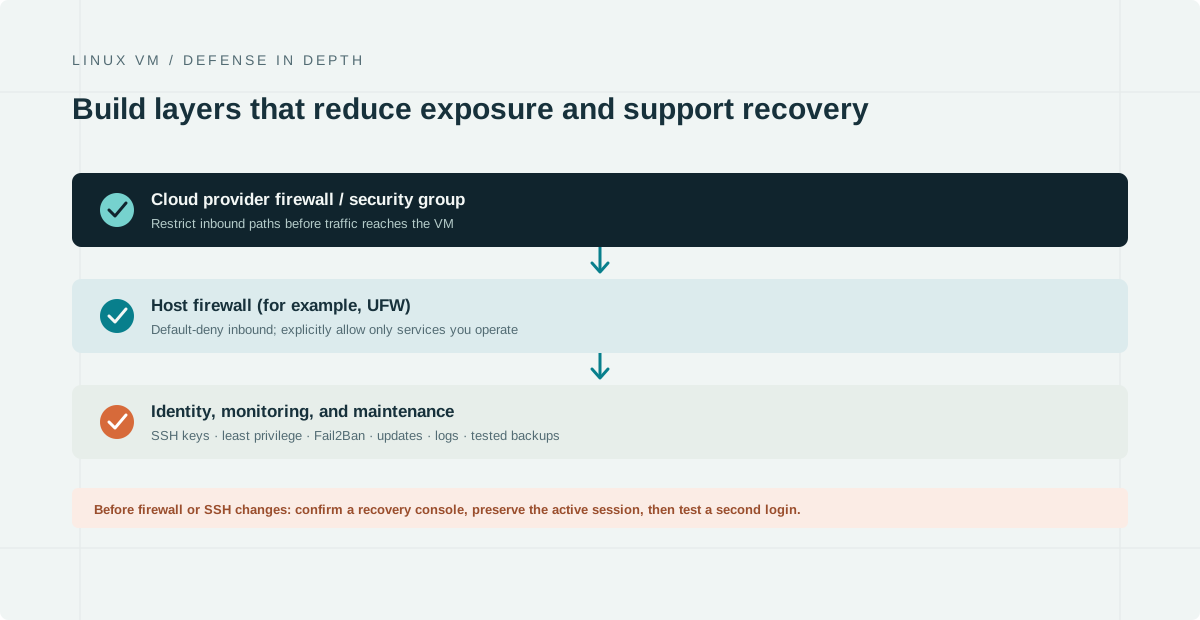
Start with an inventory: operating-system release, public and private addresses, services and ports, administrator accounts, backup status, and whether the server is managed. Find the provider’s serial, web, or recovery console and confirm how you would use it if SSH stops working. Keep a separate, current backup and avoid making risky access changes while relying on a single remote session.
Work in small, reversible steps. Keep your current administrative SSH session open while testing a second session in another terminal. If the second login fails, the first session is your opportunity to diagnose or revert. Do not close it until the new path is confirmed. Schedule changes during a maintenance window if a business service could be affected.
2. Replace password-based SSH access with tested keys
Use an individual administrator account with only the privileges needed, and prefer key-based SSH authentication over password login. Protect the private key with a passphrase and an appropriate local agent or hardware-backed key where supported. Never email, paste into tickets, or copy the private key onto the VM. Give each administrator a separate key so access can be removed for one person without sharing credentials.
On a workstation with OpenSSH, create an Ed25519 key if you do not already have a suitable key:
# Generate a passphrase-protected key pair on your workstation
ssh-keygen -t ed25519 -a 64 -C "admin@jengtraders"

# Copy/install only the public key using a trusted method,
# then test a second login before changing sshd settings:
ssh -i ~/.ssh/id_ed25519 admin@YOUR_SERVER_ADDRESS
On Windows PowerShell, the default key path is usually under $env:USERPROFILE\.ssh. Use the actual key filename and the server’s configured SSH port if it is not 22. Confirm you can authenticate with the intended non-root account and run required administrative tasks with sudo before disabling passwords.
For a typical OpenSSH server, settings to consider in the effective server configuration are:
# Example sshd settings; review distribution includes and access policy
PubkeyAuthentication yes
PasswordAuthentication no
PermitRootLogin no
OpenSSH distributions may load configuration snippets from an sshd_config.d directory, and the first value found can take precedence depending on include order. Inspect the actual configuration and distribution documentation rather than assuming a line appended to the main file wins. On many systems, sudo sshd -t validates syntax and sudo sshd -T displays effective values; confirm the correct binary and configuration path if the command is unavailable.
After applying the change, validate syntax, reload the correct service for your distribution (commonly ssh on Ubuntu/Debian or sshd on some other systems), and test a new key-based login in a second terminal. Keep the original session open. Disabling password authentication can lock out administrators who have not installed the right keys or whose automation still depends on passwords; coordinate before applying it to shared or managed servers.
3. Restrict ingress at the provider and host layers
A provider firewall or security group filters traffic before it reaches the VM. The operating system’s firewall provides another layer. Use both where available. Start from the services the server must actually provide, not a generic list of ports: a web VM might need HTTPS and perhaps HTTP for redirect or certificate validation, while a private app server may not need either port open publicly.
Before enabling UFW, identify the actual SSH port and add its allow rule first. For a new Ubuntu/Debian host that uses standard SSH on port 22 and needs public web traffic, a starting sequence is:
# Confirm the real SSH port and provider firewall first.
sudo ufw allow OpenSSH
sudo ufw allow 80/tcp
sudo ufw allow 443/tcp
sudo ufw default deny incoming
sudo ufw default allow outgoing
sudo ufw status verbose

# Enable only after confirming SSH is allowed and recovery is available.
sudo ufw enable
sudo ufw status numbered
If SSH uses a non-standard port, add a rule for that port before enabling UFW. If administration should be limited to a known address range, consider a source-restricted rule—but ensure there is a plan for changing or unavailable administrator IPs. Remove rules for services that are not needed. Be especially cautious about database, cache, and administration ports: keep them private or restrict them to trusted networks rather than exposing them to the internet.
Review IPv6 policy as well as IPv4; UFW commonly manages both when IPv6 support is enabled in its configuration. Verify the cloud firewall/security group, UFW status, and the ports actually listening on the server. Provider dashboards and network ACLs use different terminology, so read the provider’s current documentation and test access from an external network when practical.
4. Use Fail2Ban as an additional signal and control
Fail2Ban watches authentication logs and can temporarily block addresses that match repeated failed-login patterns. It can reduce noise from some automated attempts, but it is not a substitute for key authentication, least privilege, updates, or firewalls. It cannot stop every distributed or low-and-slow attempt, and incorrect settings can ban a legitimate administrator.
On a Debian/Ubuntu system where the package is available, install Fail2Ban using the distribution’s package manager, then use a local override rather than editing a package-managed default file. For example, create /etc/fail2ban/jail.d/sshd.local:
[DEFAULT]
findtime = 10m
maxretry = 5
bantime = 1h

[sshd]
enabled = true
These are example thresholds, not universal values. Check the installed Fail2Ban version, SSH service name, log backend, and whether your provider or distribution already supplies a jail. Validate the configuration and inspect the service after restart. Use sudo fail2ban-client status and sudo fail2ban-client status sshd to review status where supported. Ensure your administrator source addresses are handled according to policy, and know how to unban an address through the console before relying on the service.
5. Apply security updates with a reboot plan
Unpatched operating systems and applications can remain vulnerable even when SSH and the firewall are configured well. Keep the OS, kernel, web server, runtime, control panel, and installed applications on supported versions. On Ubuntu and Debian, unattended-upgrades can automate package updates according to the configured origins and schedule. Review which updates are selected, how notifications are delivered, and whether a reboot is required.
# Ubuntu/Debian example: install the package
sudo apt update
sudo apt install unattended-upgrades

# Review configuration and status using your release's guidance
sudo systemctl status unattended-upgrades
Package names, timers, and configuration differ across releases; follow the official guide for the installed OS. Automatic updates do not eliminate the need to monitor failures, review breaking changes, and plan kernel or service restarts. For critical production systems, stage updates where practical, verify backups first, and define who is alerted if updates fail. Do not configure automatic reboots without understanding the impact on application availability.
6. Add the operational controls that hardening depends on
- Least privilege: remove unused accounts and keys, restrict sudo access, and avoid routine administration as root.
- Backups: keep encrypted, access-controlled backups separate from the VM and test a restore. A snapshot alone may not be a consistent application backup.
- Monitoring: collect authentication and system logs, watch disk and memory capacity, and alert on service failures and update errors.
- Secrets: avoid storing credentials in shell history or world-readable files; rotate credentials after suspected exposure and when access changes.
- Application exposure: patch exposed software, remove unused services, use TLS for web applications, and restrict administrative panels to trusted networks or VPNs.
- Recovery: document console access, owner contacts, firewall rules, restore steps, and the process to revoke a compromised key.
Security controls work as a system. A firewall can reduce reachable services; keys can make guessed passwords ineffective for SSH; updates address known flaws; and tested recovery reduces the impact of mistakes or incidents. None of these measures guarantees that a VM cannot be compromised. The goal is to reduce avoidable exposure, detect problems sooner, and recover predictably.
A safer deployment checklist
- Confirm OS support, business owner, required services, SSH port, backup, and provider recovery console.
- Create a named administrator account and install a passphrase-protected public key.
- Test a second key-based login before changing authentication policy.
- Apply SSH settings, validate the effective configuration, reload the correct service, and test again without closing the original session.
- Allow the actual SSH port in the provider firewall and UFW before enabling default-deny ingress.
- Open only required web or application ports; verify IPv4 and IPv6 exposure.
- Configure Fail2Ban and security updates according to the distribution’s official documentation.
- Monitor logs, retain independent backups, test restoration, and document a rollback/recovery route.
A blanket claim that these steps eliminate 95% of attacks is not supportable: exposure and risk vary by software, configuration, threat actor, and business. Treat this as a starting baseline, then assess the VM’s role, data sensitivity, compliance needs, and provider-specific controls. For regulated or business-critical systems, have a qualified administrator review the design.
Official documentation and references
- OpenBSD manual: sshd_config — OpenSSH server authentication and access settings.
- Ubuntu Server documentation: OpenSSH server — SSH setup and server configuration guidance.
- Ubuntu Server documentation: Firewalls — UFW and host firewall administration.
- Ubuntu manual: ufw — UFW command reference.
- Fail2Ban project documentation — installation, configuration, and jail behavior.
- Ubuntu Server documentation: Automatic updates — unattended security updates and configuration.
- AWS documentation: Security groups — example of provider-level instance traffic controls.
- Microsoft Azure documentation: Network security groups — Azure network traffic filtering.